

Last Updated on June 19, 2026 by The Official Game Rules Team
This post contains affiliate links. For more information, see our disclosures here.
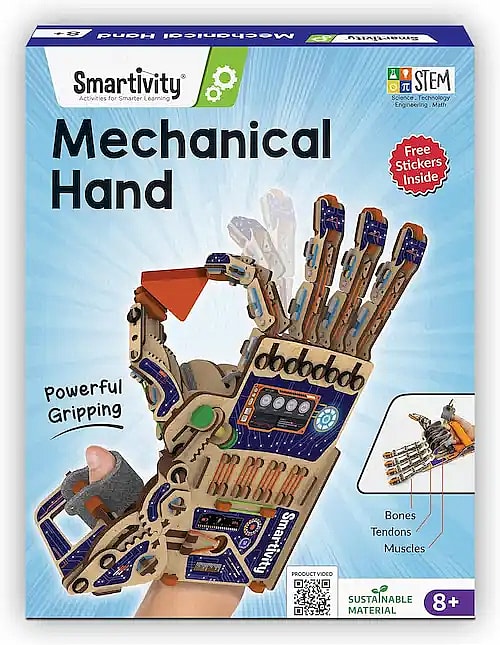
How to Play Smartivity DIY Robotic Mechanical Hand
Introduction
The Smartivity DIY Robotic Mechanical Hand is a hands-on STEM building kit that combines engineering, mechanics, and creativity into a single project. Designed for children ages 8 to 14, this kit allows builders to construct a working mechanical hand that replicates many of the movements of a real human hand.
As children assemble the model, they gain practical experience with mechanical linkages, motion transfer, and basic engineering concepts. The finished robotic hand can grip, pinch, and manipulate objects using a system of strings, levers, and joints, making it both an educational project and a fun interactive toy.
Safety Information
Before beginning assembly, review the following safety guidelines:
- Adult assistance is recommended, especially for younger builders.
- The kit contains small components that may present a choking hazard. Keep all parts away from children under 3 years of age.
- Use the robotic hand only as intended and avoid forcing moving parts.
- Assemble the model on a clean, flat surface to prevent losing pieces.
- Store unused parts and tools in a safe location during construction.
What’s Included
Your Smartivity DIY Robotic Mechanical Hand kit contains all components needed to complete the project, including:
- Pre-cut wooden sheets
- Transparent clear sheet
- Stacking blocks
- Decorative stickers
- Assembly hardware and loose parts
- Rubber bands
- Cushioning foam pieces
- Detailed instruction booklet
No glue or specialized tools are required for assembly.
Assembly Instructions
Follow the instruction booklet carefully and complete each stage in order.
Step 1: Remove and Organize the Pieces
Carefully press the wooden components out of the pre-cut sheets. Sort the pieces by type and keep similar parts together. This will make assembly much easier later.
Inspect each piece before use and remove any small wooden tabs left from the manufacturing process.
Step 2: Build the Fingers
Construct each finger individually by connecting the finger segments together.
Pay close attention to the orientation of each section. The joints must be positioned correctly to allow smooth movement once the hand is completed.
Attach the elastic connectors and rings as shown in the instructions.
Step 3: Assemble the Thumb
Build the thumb using the designated components and connect the moving sections together.
The thumb is essential for gripping objects, so make sure all pieces are aligned properly and can move freely.
Step 4: Construct the Palm
Assemble the main palm structure that supports the fingers.
This section contains many of the mechanical components responsible for transferring movement throughout the hand.
Take extra time to ensure all slots and joints fit securely.
Step 5: Attach the Fingers and Thumb
Connect the completed fingers and thumb to the palm assembly.
Check that each finger bends and returns smoothly without resistance.
If a finger feels stiff, verify that the pieces are installed in the correct direction.
Step 6: Install the Control System
Attach the control strings, straps, and mechanical linkages.
These components allow the robotic hand to mimic human finger movement when operated.
Ensure all strings are routed through the correct channels and secured firmly.
Step 7: Add Foam and Finishing Components
Install any foam pads or support pieces included in the kit.
These components help improve comfort and stability during operation.
Step 8: Apply Stickers
Once assembly is complete, decorate the robotic hand using the included stickers.
Players can customize the appearance of the hand however they choose.
How to Use the Robotic Hand
After assembly, place your hand inside the device and position your fingers within the control straps.
Your thumb should fit into the designated thumb grip.
Pulling the straps activates the mechanical system, causing the fingers to bend in a manner similar to a real hand.
Pinch Grip
Use the thumb and one finger together to pick up smaller objects.
This grip works well for:
- Stacking blocks
- Small toys
- Lightweight items
Power Grip
Engage all fingers and the thumb to hold larger objects.
This grip can be used for:
- Cups
- Bottles
- Larger blocks
- Everyday household objects
Experiment with Hand Movements
Try creating different hand positions and gestures.
Observe how the mechanical system transfers movement from your fingers to the robotic hand.
This is a great way to learn how linkages and joints work together.
Maintenance
Proper care will help keep the robotic hand functioning smoothly.
Cleaning
Wipe the wooden parts with a soft, dry cloth.
Do not soak the model or expose it to excessive moisture.
Avoid using cleaning chemicals or sprays.
Storage
Store the completed model in a cool, dry location.
Keep it away from direct sunlight, excessive heat, and damp environments.
Replacing Rubber Bands
Over time, rubber bands may stretch or wear out.
Replace any damaged bands with the spare bands included in the kit to maintain proper movement and tension.
Troubleshooting
Fingers Do Not Move Properly
- Check that all rubber bands are attached correctly.
- Make sure no strings are tangled.
- Verify that joints can move freely.
Parts Do Not Fit Together
- Confirm you are using the correct pieces.
- Review the assembly diagrams.
- Ensure all tabs are fully inserted into their slots.
Hand Feels Stiff
- Check for overtightened components.
- Make sure moving joints are not blocked.
- Verify proper string routing.
Product Specifications
| Feature | Details |
|---|---|
| Recommended Age | 8–14 Years |
| Material | Engineered Wood |
| Model Number | SMRT1135 |
| Weight | 8.8 oz |
| Dimensions | 11.81 × 9.84 × 7.48 inches |
Tips for Success
- Organize all pieces before starting assembly.
- Follow the instruction booklet step by step without skipping ahead.
- Test finger movement frequently during construction.
- Avoid forcing pieces together if they do not fit naturally.
- Keep spare rubber bands in a safe place for future maintenance.
- Work on a large, clean surface where small parts are easy to find.
- Take your time during assembly to ensure the hand operates smoothly once completed.
Video Tutorial
Conclusion
The Smartivity DIY Robotic Mechanical Hand is an excellent STEM project that combines building, learning, and play. By assembling a functioning mechanical hand, children gain hands-on experience with engineering principles, mechanics, and problem-solving while creating a model they can actively use. Whether used at home, in a classroom, or as part of a STEM program, this kit provides an engaging way to explore how mechanical systems can replicate real-world movements.
Browse Related Games!
 Official Sirens Rules
 Official Marble Balance Board Game Rules
 Official Bear Mountain Camping Adventure Rules
 Official TRAILS Rules
 Official Mancala Rules
 Official Booty Dice Rules
 Official Guess Who? Rules
 Official Pizza Party Rules
 Official Gravity Maze Rules
 Official MonsDRAWsity Rules
 Official The Attic Monster Rules
 Official Connect More Rules